之前有用過 Google 的 Blogger 寫過短暫的文章,這次看到 Vuepress (opens new window) 立馬想到搭配 Github Pages (opens new window) 應該是蠻不錯的,果然一查已經有不少人這麼做。當下覺得蠻有趣的不如重新再來寫部落格吧。
# create-vuepress 建立初始 project
Vuepress 官方有提供 CLI 為 create-vuepress (opens new window) 直接輸入
$ yarn create vuepress [appName]
一開始會問你,是要建立 docs 還是 blog ,我是選 blog 然後依照畫面指示輸入就完成初始建立。
完成後資料夾架構大概會像下面這樣:
.
├── .gitignore
├── README.md
├── blog
│   ├── .vuepress
│   │   ├── components
│   │   │   ├── Foo
│   │   │   │   └── Bar.vue
│   │   │   ├── OtherComponent.vue
│   │   │   └── demo-component.vue
│   │   ├── config.js
│   │   ├── enhanceApp.js
│   │   └── styles
│   │       ├── global.styl
│   │       ├── index.styl
│   │       └── palette.styl
│   └── _posts
│       ├── 2018-11-7-frontmatter-in-vuepress-2.md
│       ├── 2018-11-7-frontmatter-in-vuepress-3.md
│       ├── 2018-11-7-frontmatter-in-vuepress.md
│       ├── 2019-2-26-markdown-slot-2.md
│       ├── 2019-2-26-markdown-slot-3.md
│       ├── 2019-2-26-markdown-slot-4.md
│       ├── 2019-2-26-markdown-slot.md
│       ├── 2019-5-6-writing-a-vuepress-theme-2.md
│       ├── 2019-5-6-writing-a-vuepress-theme-3.md
│       ├── 2019-5-6-writing-a-vuepress-theme-4.md
│       └── 2019-5-6-writing-a-vuepress-theme.md
└── package.json
2
3
4
5
6
7
8
9
10
11
12
13
14
15
16
17
18
19
20
21
22
23
24
25
26
27
28
29
這時候你就可以試跑起來看看了,記得要先安裝 dependencies ,執行:
yarn && yarn dev
# 設定 Github Pages (opens new window)
如果你的 project 是放在 Github (opens new window) 上,想要使用靜態頁面,其實很簡單,只要將你的東西推到 gh-pages 這個 branch 就好了。那麼你的靜態網頁對應位置會像下面這樣:
- repository:
https://github.com/[USER_NAME]/[REPO_NAME]/ - github pages:
https://[USER_NAME].github.io/[REPO_NAME]/
記得要去修改 Vuepress 的 config 檔。
// blog/.vuepress/config.js
module.exports = {
  base: '/[REPO_NAME]/',
};
2
3
4
# 申請 $GITHUB_TOKEN
$GITHUB_TOKEN 是為了讓之後的 Travis CI (opens new window) 來介接你 Github 上的 repo。在下面的章節 設定 Travis CI 會使用到。
- Github 先前往設定頁面 Settings > Developer settings
- 選擇 Personal access tokens > Generate new token
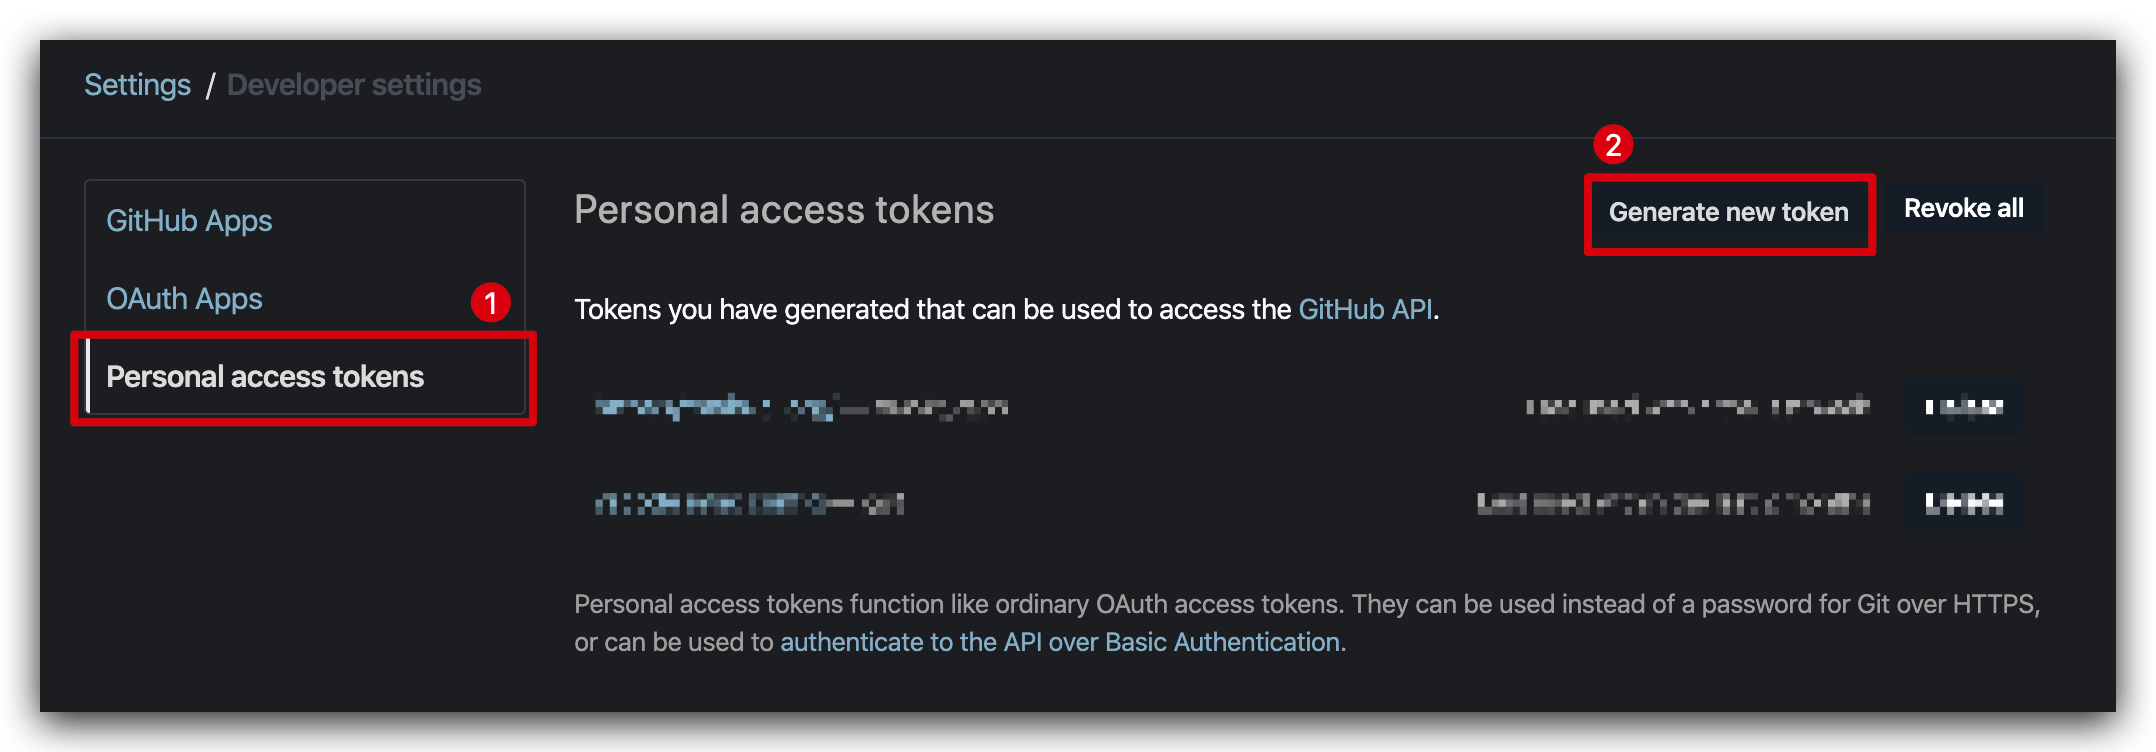
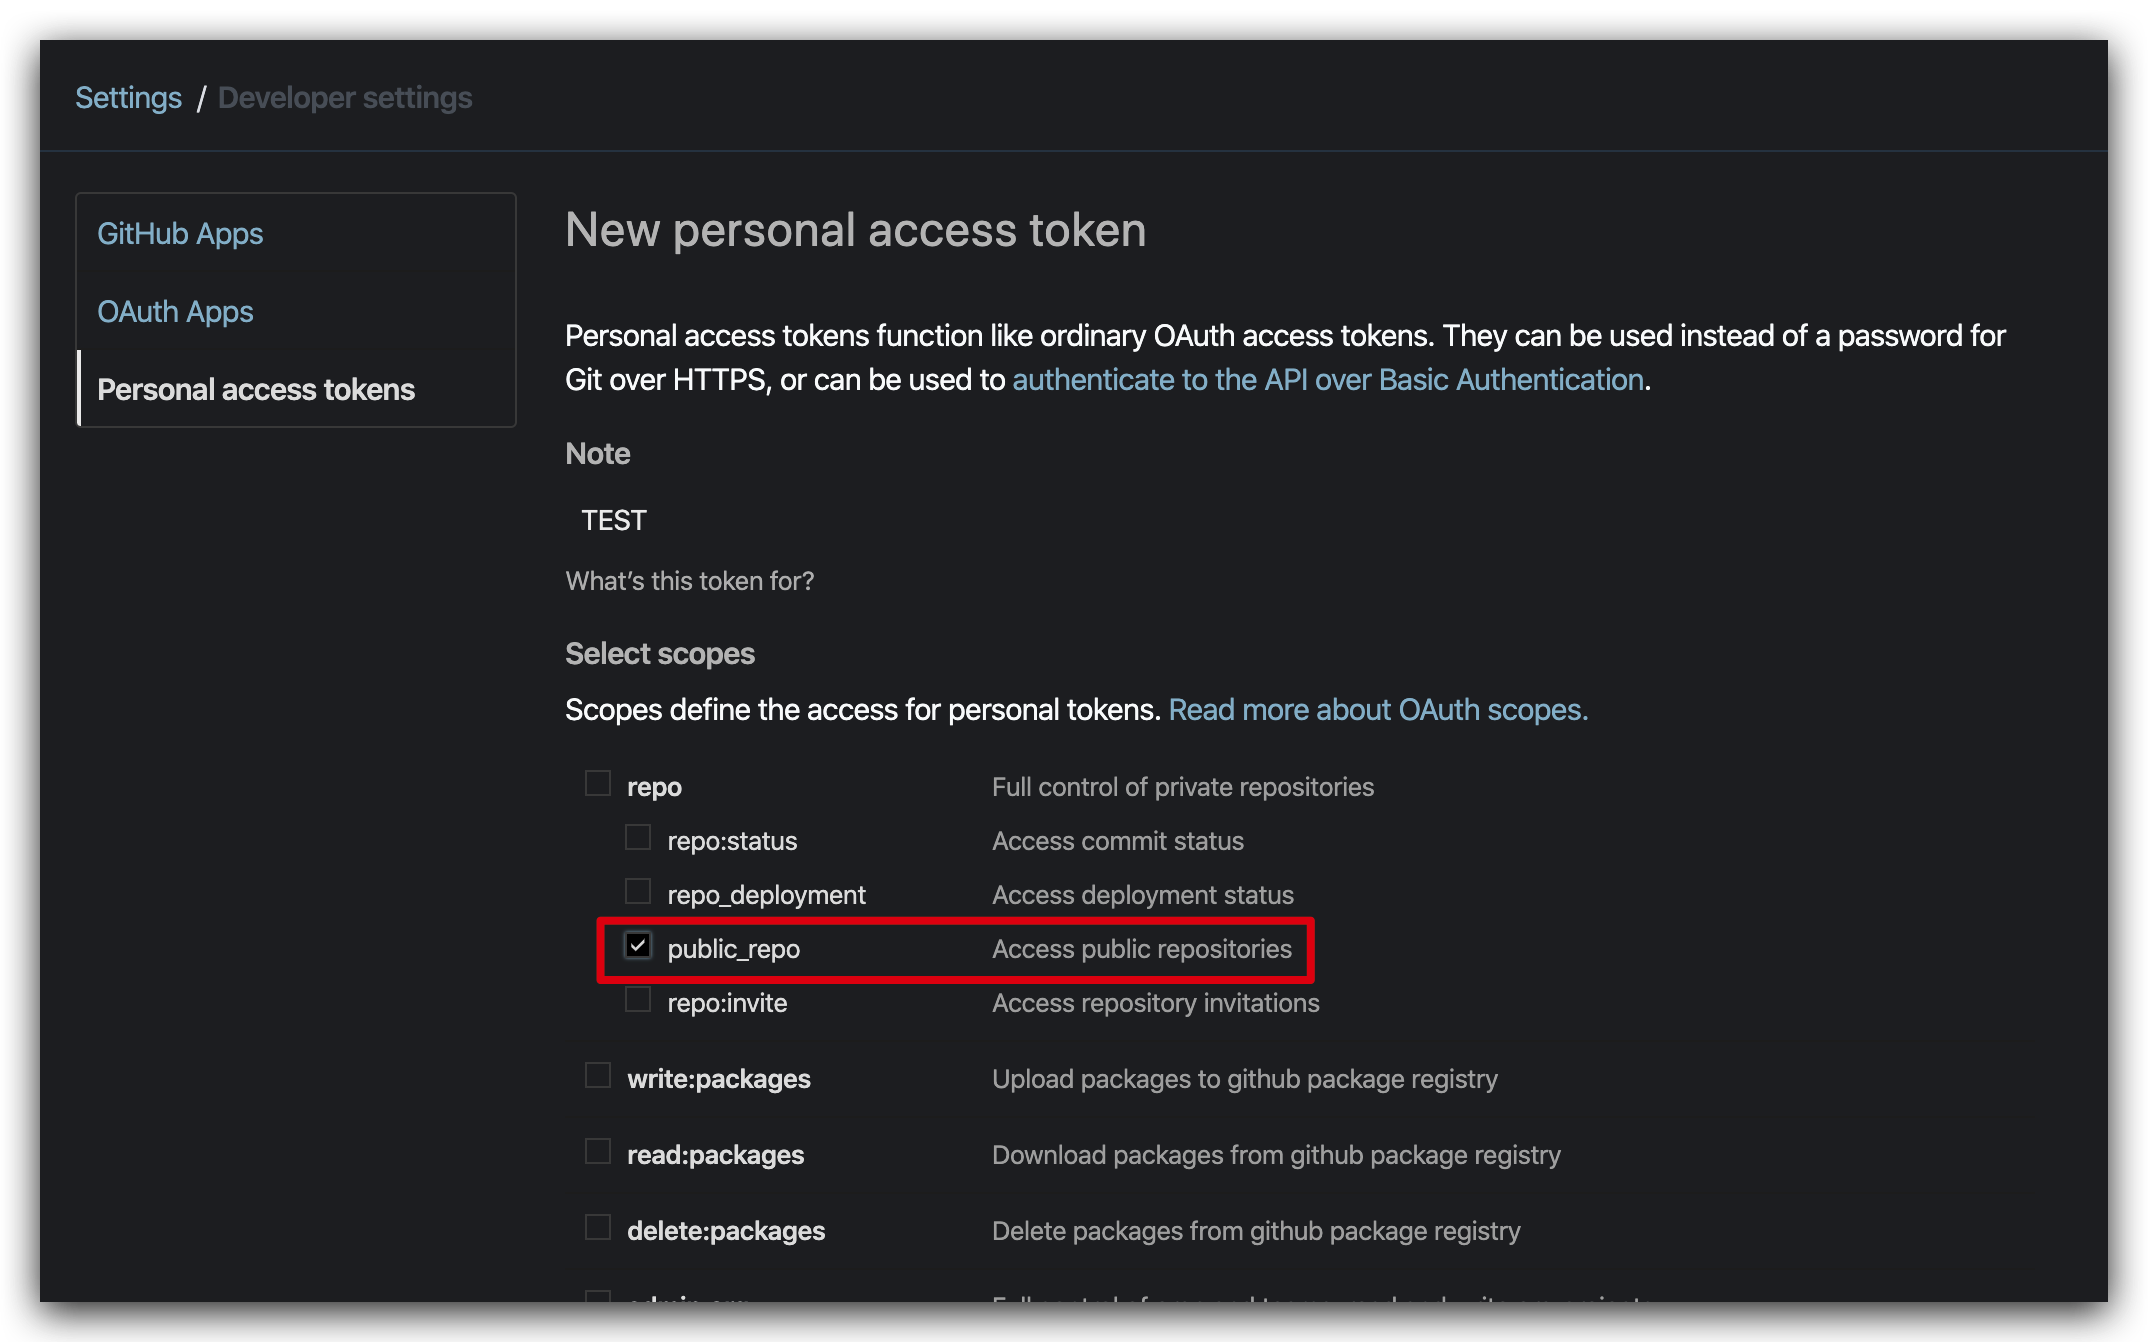
- 勾選 public_repo
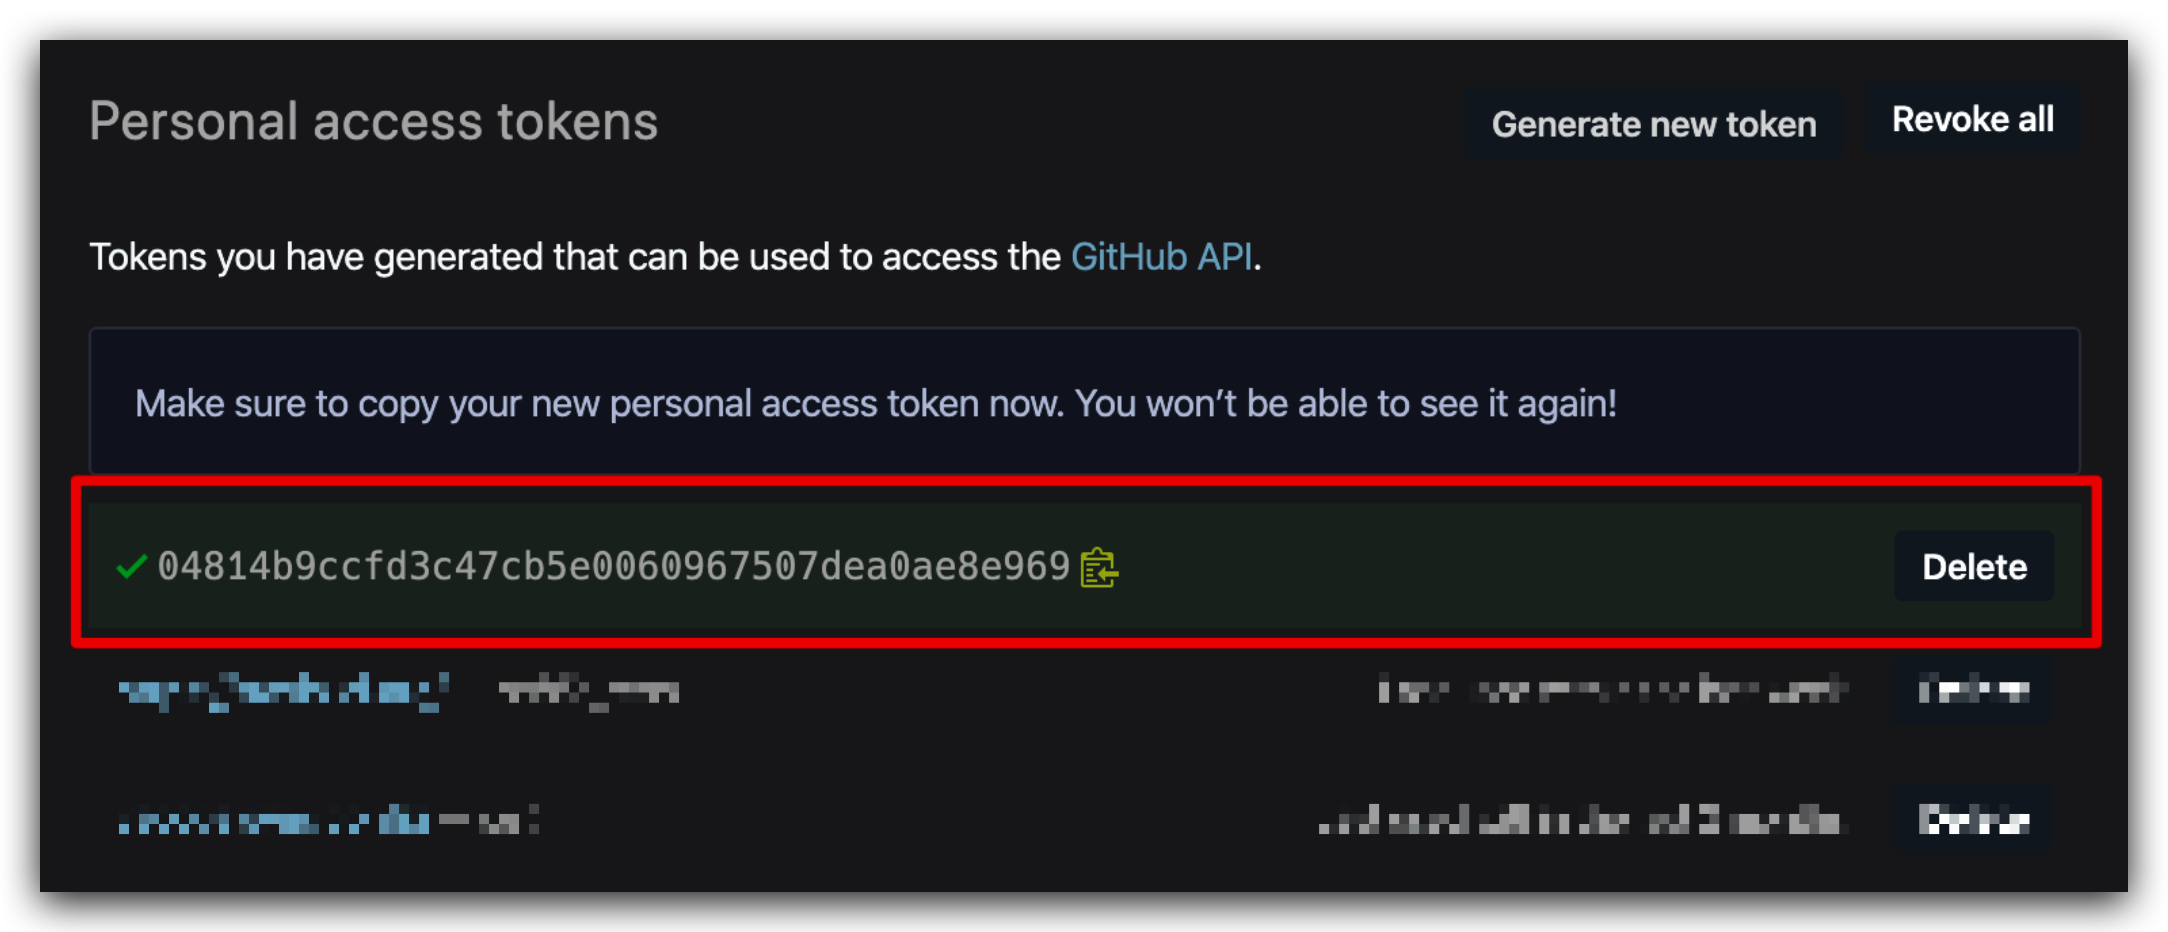
- 這一串就是你的
$GITHUB_TOKEN
# 搭配 Travis CI
每次都要 build 完並 push 到 gh-pages 太麻煩,所以官網建議 (opens new window)使用 Travis CI (opens new window)。而 Github (opens new window) 與 Travis CI 連動需要幾個步驟。
# 1. 在根目錄上建立 .travis.yml 內容如下:
language: node_js
node_js:
  - lts/*
install:
  - yarn install
script:
  - yarn build # npm run docs:build
deploy:
  provider: pages
  skip_cleanup: true
  local_dir: blog/.vuepress/dist
  github_token: $GITHUB_TOKEN
  keep_history: true
  on:
    branch: master
2
3
4
5
6
7
8
9
10
11
12
13
14
15
這時候會發現設定檔中 $GITHUB_TOKEN 這個欄位,也就是我們上面申請的 TOKEN 。
千萬不要把
TOKEN直接寫在設定檔中,畢竟我們的 repo 是公開的,要設定在 Travis CI (opens new window) 的環境變數中。
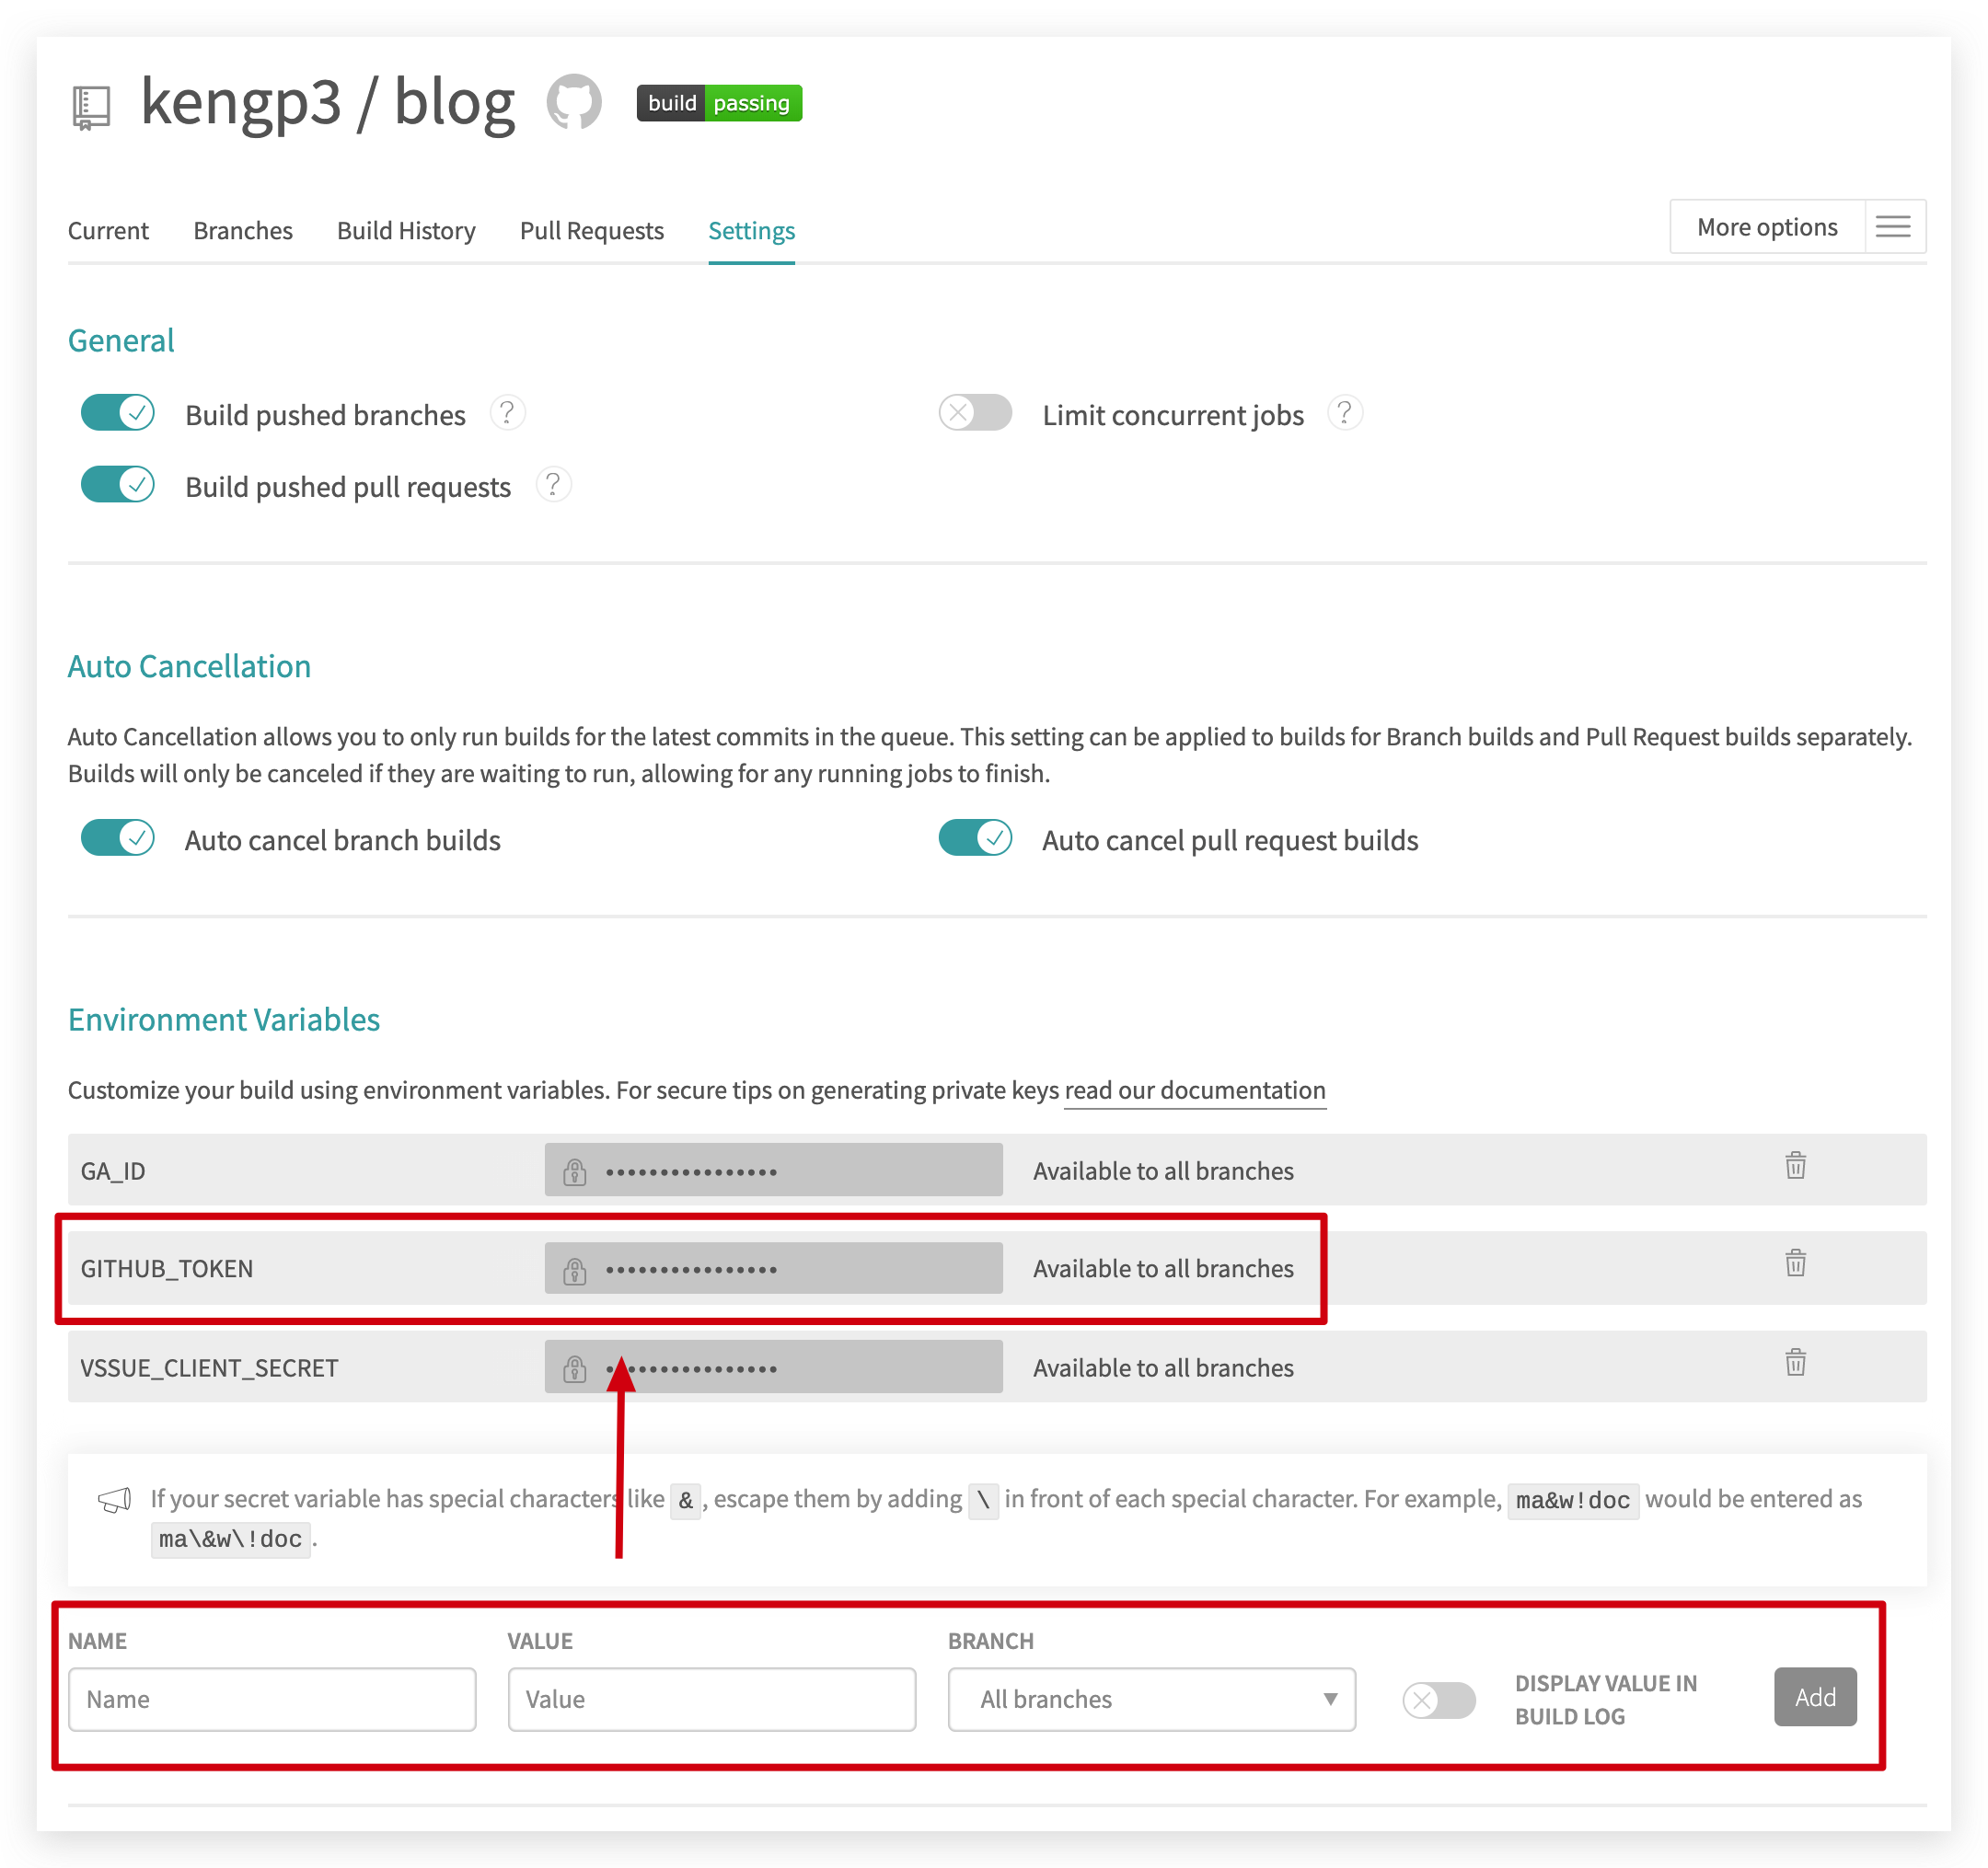
# 2. 設定 Travis CI (opens new window)
- 使用 Github 帳號登入
- 啟用你的 Blog repository
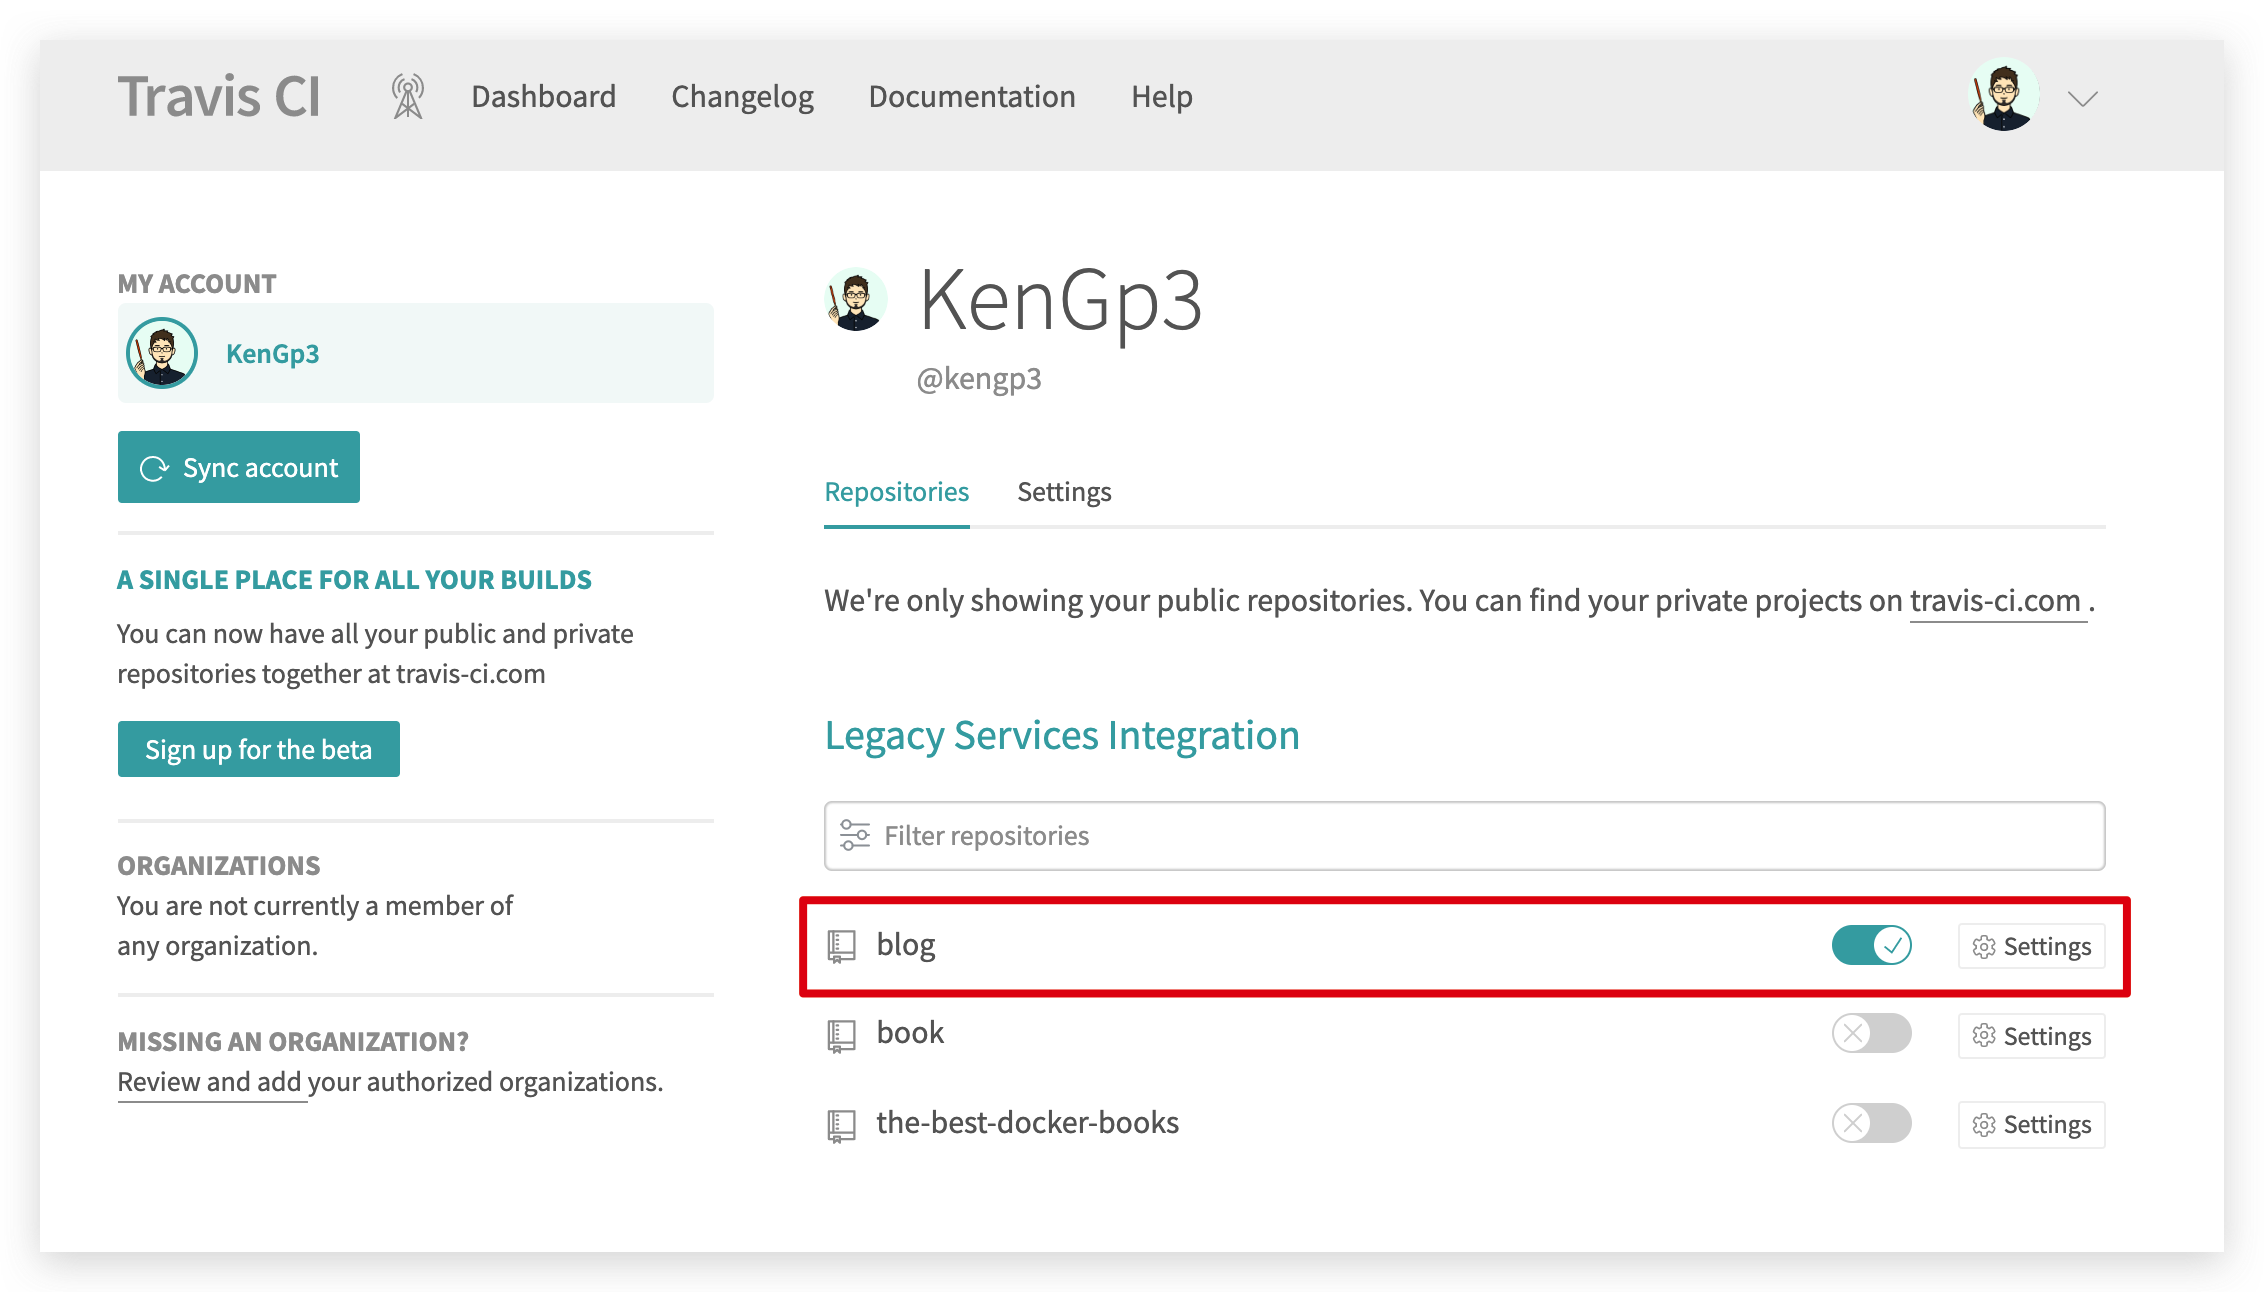
- 點 Settings > 設定
$GITHUB_TOKEN環境變數
# 結束
基本上到這邊已經完成了,現在你只需要將你的內容 push 到 master 之後都會自動完成。